iOS) UICollectionView 에서 당겨서 새로고침 구현
내용
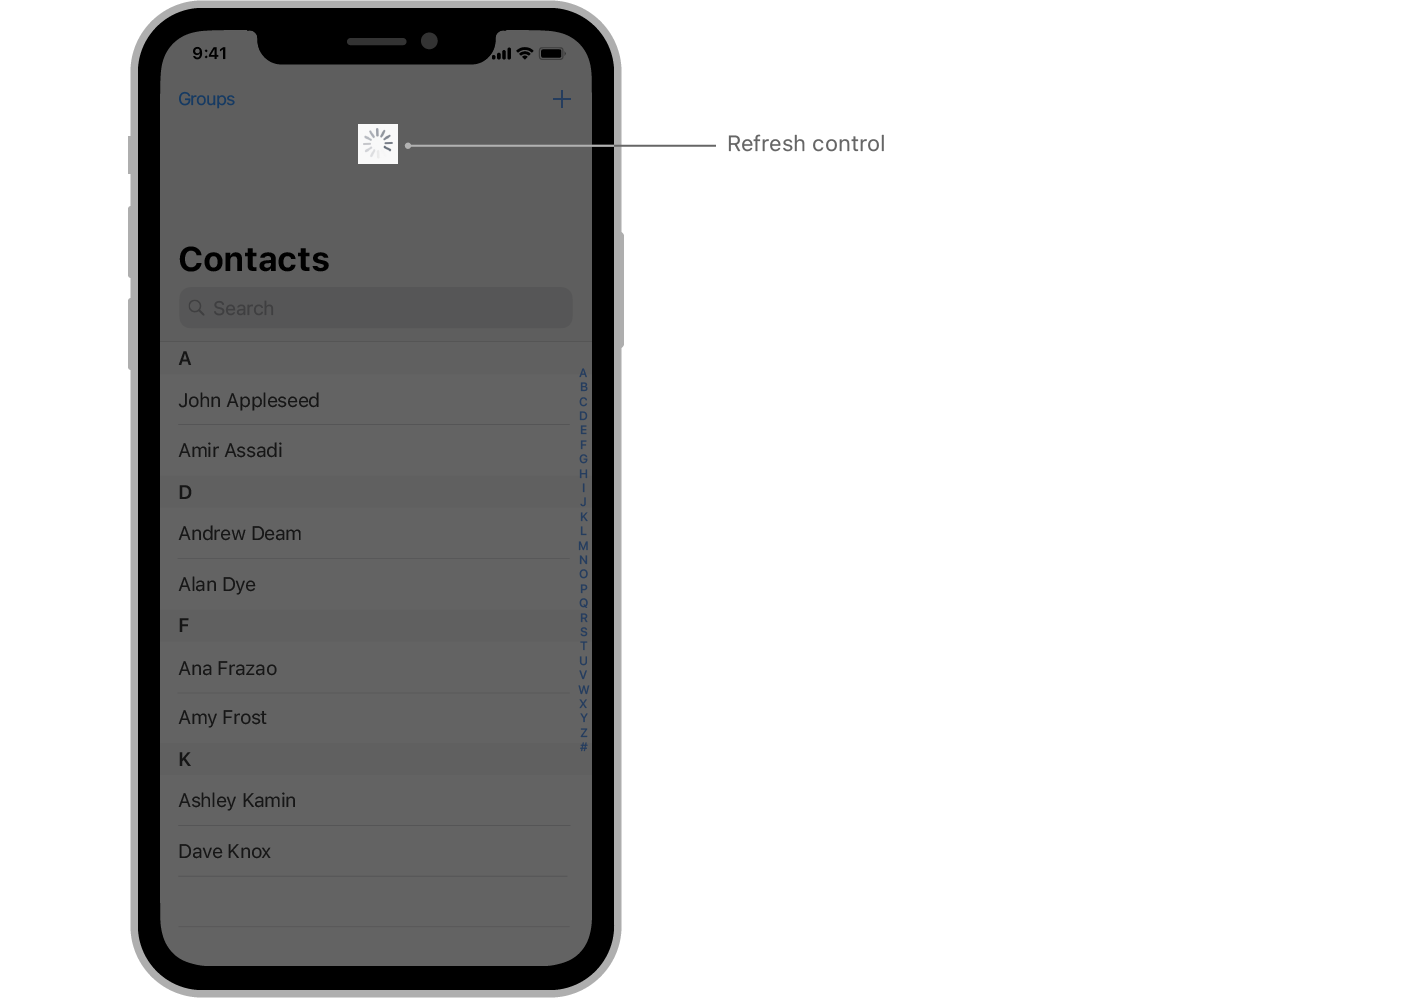
- 인스타그램처럼 뷰를 아래로 당겨서 새로고침을 구현해보자.
- UIRefreshControl 인스턴스를 만들어서 scroll view 의 refreshControl 에 적용해보자.
개발자 문서를 살펴보자!
♻️ UIRefreshControl
scroll view 컨텐츠의 새로고침을 시작할 수 있는 표준 control.
Overview
UIRefreshControl 개체는 table view 와 collection view 를 포함하여 UISrollView 개체에 연결하는 표준 control 입니다.
스크롤 가능한 뷰에 추가해서 사용자에게 컨텐츠를 새로고침할 수 있는 표준 방법을 제공합니다. 사용자가 스크롤 가능한 컨텐츠 영역의 상단을 아래로 드래그하면, scroll view 가 refresh control 을 표시하고, progress indicator 에 애니메이션을 적용하여 앱에 알립니다.
해당 알림을 사용하여 컨텐츠를 업데이트 하고 refresh control 를 해제할 수 있습니다.
refresh control 사용하면 UIControl 의 target-action 메커니즘을 사용해서 컨텐츠의 업데이트할 시기를 알 수 있습니다.
활성화 시 refresh control 는 만들때 구성했던 action method 를 호출합니다. action method 를 추가할때 아래 예제 코드처럼 valueChanged(이벤트를 수신하도록 구성합니다. 콘텐츠를 업데이트한 뒤에 refresh control 의 endRefreshing() 메서드를 호출합니다.
✨ endRefreshing()
refresh operation 이 종료되었음을 control 에게 알린다.
Discussion
refresh control 를 기본 상태로 되돌리기위해서 새로 고침 작업이 끝날때(프로그래밍 방식이든 사용자에 의해서 시작했든) 해당 메서드를 호출합니다.
refresh control 이 최소한 부분적으로 표시되는 경우, 이 메서드를 호출하면 control 도 숨겨집니다. 애니메이션이 활성화된 경우, control 은 애니메이션을 사용해서 컨트롤이 숨겨집니다.
- 예제코드
func configureRefreshControl () {
   // Add the refresh control to your UIScrollView object.
   myScrollingView.refreshControl = UIRefreshControl()
   myScrollingView.refreshControl?.addTarget(self, action:
                                      #selector(handleRefreshControl),
                                      for: .valueChanged)
}

@objc func handleRefreshControl() {
   // Update your content…

   // Dismiss the refresh control.
   DispatchQueue.main.async {
      self.myScrollingView.refreshControl?.endRefreshing()
   }
}
UITableViewController 를 사용하는 경우를 살펴보면, 해당 refresh control 프로퍼티를 UIRefreshControl 인스턴스에 할당합니다. 그런다음 valueChanged 이벤트에 대한 action method 를 연결해서 연결된 table view 의 새로고침 동작을 관리합니다.
🚧 Important UIRefreshControl 은 사용자 인터페이스 idiom 이 UIUserInterfaceIdiom.mac(= 현재 device 에서 사용할 인터페이스 스타일이 Mac 이다.) 인 경우 사용할 수 없다. 그러나 Mac idiom 에서 유사한 기능을 제공하도록 앱을 업데이트 할 수 있다.(즉, Mac 용 앱에 적용되는 이야기이다.) 더 자세한 정보는 Adding Menus and Shortcuts to the Menu Bar and User Interface 를 살펴보자.
</aside>
Xcode 에서 UIRefreshControl 의 정의를 살펴보자.
- tinitColor 와 title 을 설정할 수 있었다.
@available(iOS 6.0, *)
open class UIRefreshControl : UIControl {


    /* The designated initializer
     * This initializes a UIRefreshControl with a default height and width.
     * Once assigned to a UITableViewController, the frame of the control is managed automatically.
     * When a user has pulled-to-refresh, the UIRefreshControl fires its UIControlEventValueChanged event.
     *
    */
    public init()


    open var isRefreshing: Bool { get }

    // ✅ The tint color for the refresh control.
    open var tintColor: UIColor!

    // ✅ The styled title text to display in the refresh control.
    open var attributedTitle: NSAttributedString?


    // May be used to indicate to the refreshControl that an external event has initiated the refresh action
    @available(iOS 6.0, *)
    open func beginRefreshing()

    // Must be explicitly called when the refreshing has completed
    @available(iOS 6.0, *)
    open func endRefreshing()
}
♻️ 적용하기!
- 서버통신을 통해서 데이터를 UICollectionView 에 보여주는 코드에 적용해보자!
    // ✅ initialize Refresh Control.
    private func initRefreshControll() {
        refreshControl.addTarget(self, action: #selector(refreshCollectionView), for: .valueChanged)
        mainCollectionView.refreshControl = refreshControl
    }

// MARK: - Objc Methods

    @objc
    private func refreshCollectionView() {
        // ✅ initialize.
        habitRoomLastID = -1
        habitRoomList?.removeAll()

        DispatchQueue.main.async {
            // ✅ 서버통신 성공 시 mainCollectionView 를 reload 하고 있다.
            self.habitRoomFetchWithAPI(lastID: self.habitRoomLastID) {
                // ✅ reload 가 된 후 refresh operation 종료.
                self.refreshControl.endRefreshing()
            }
        }
    }
결과